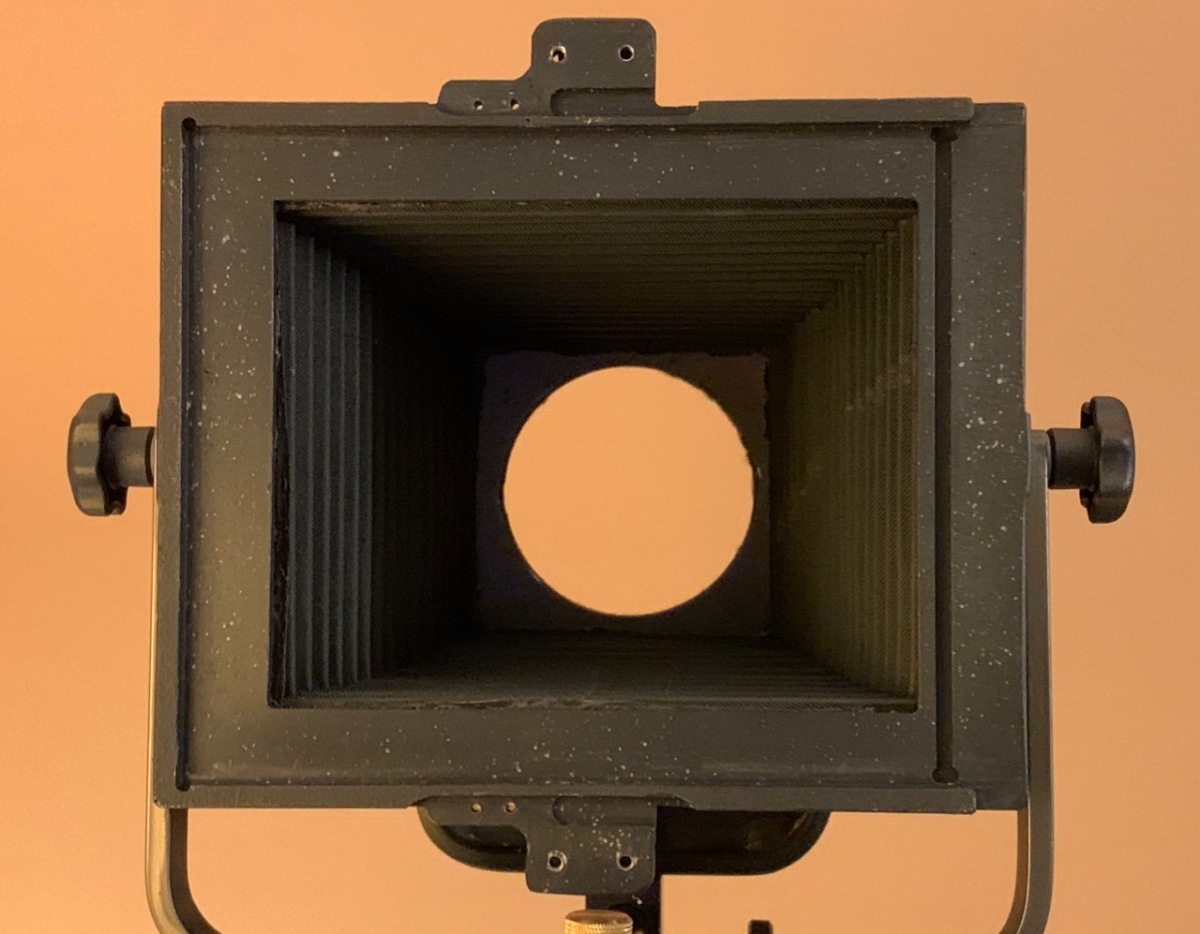
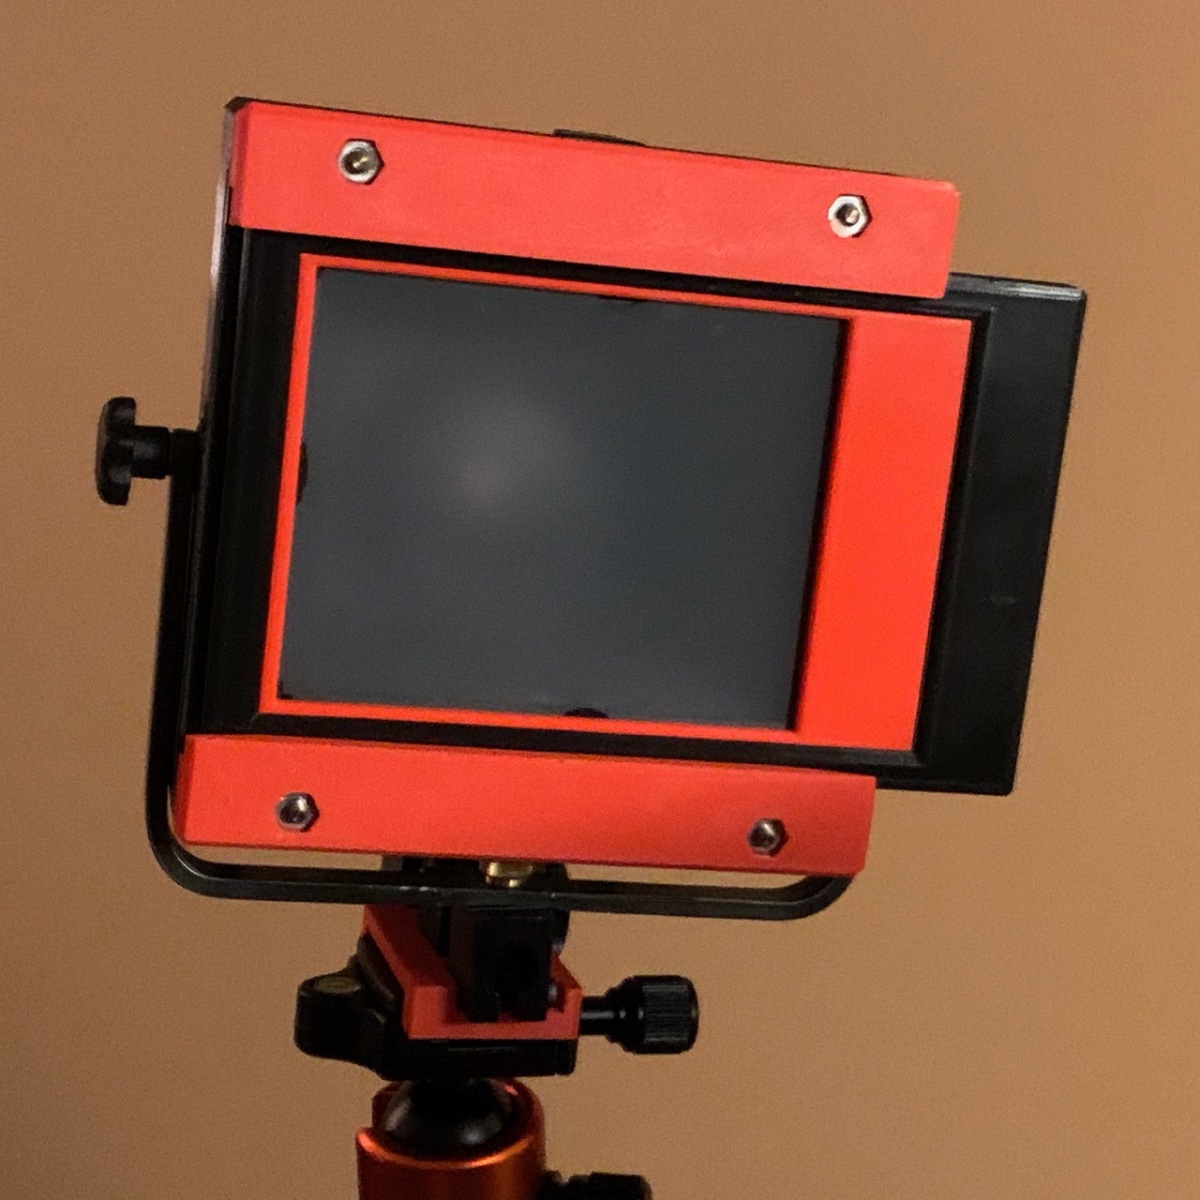
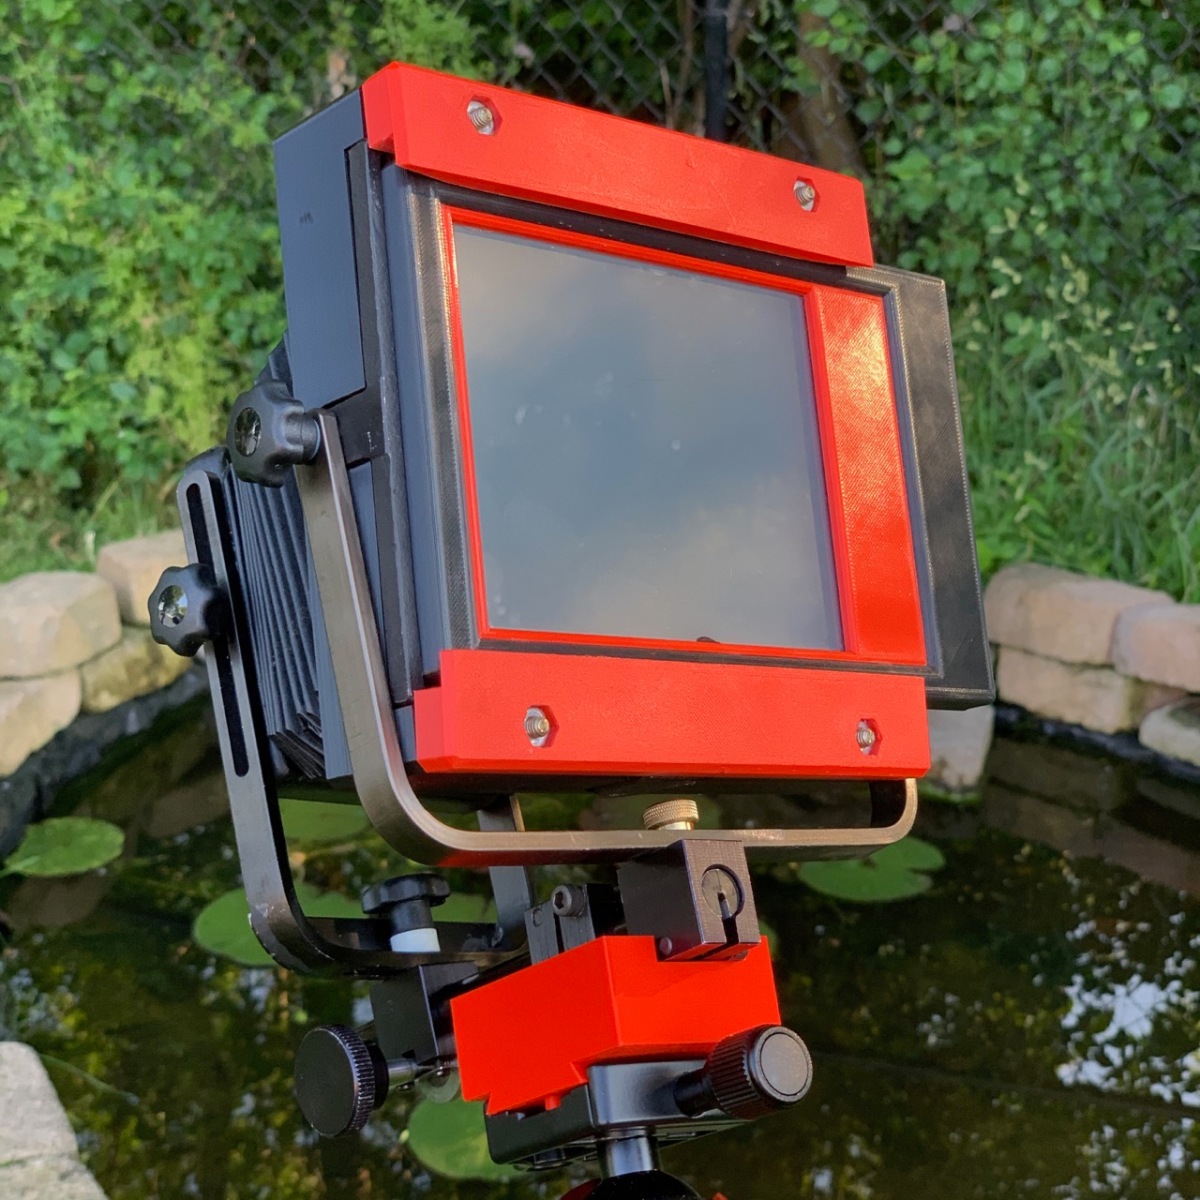
Purpose
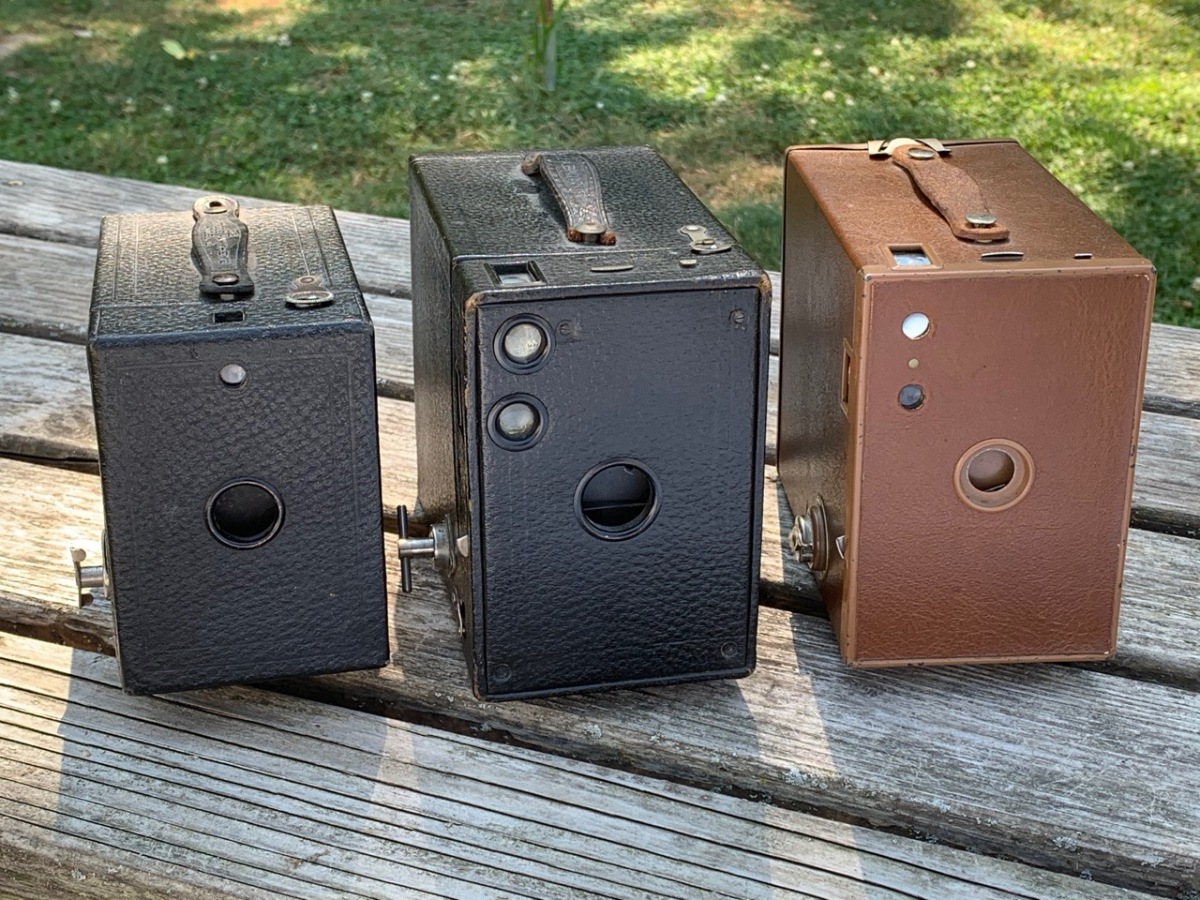
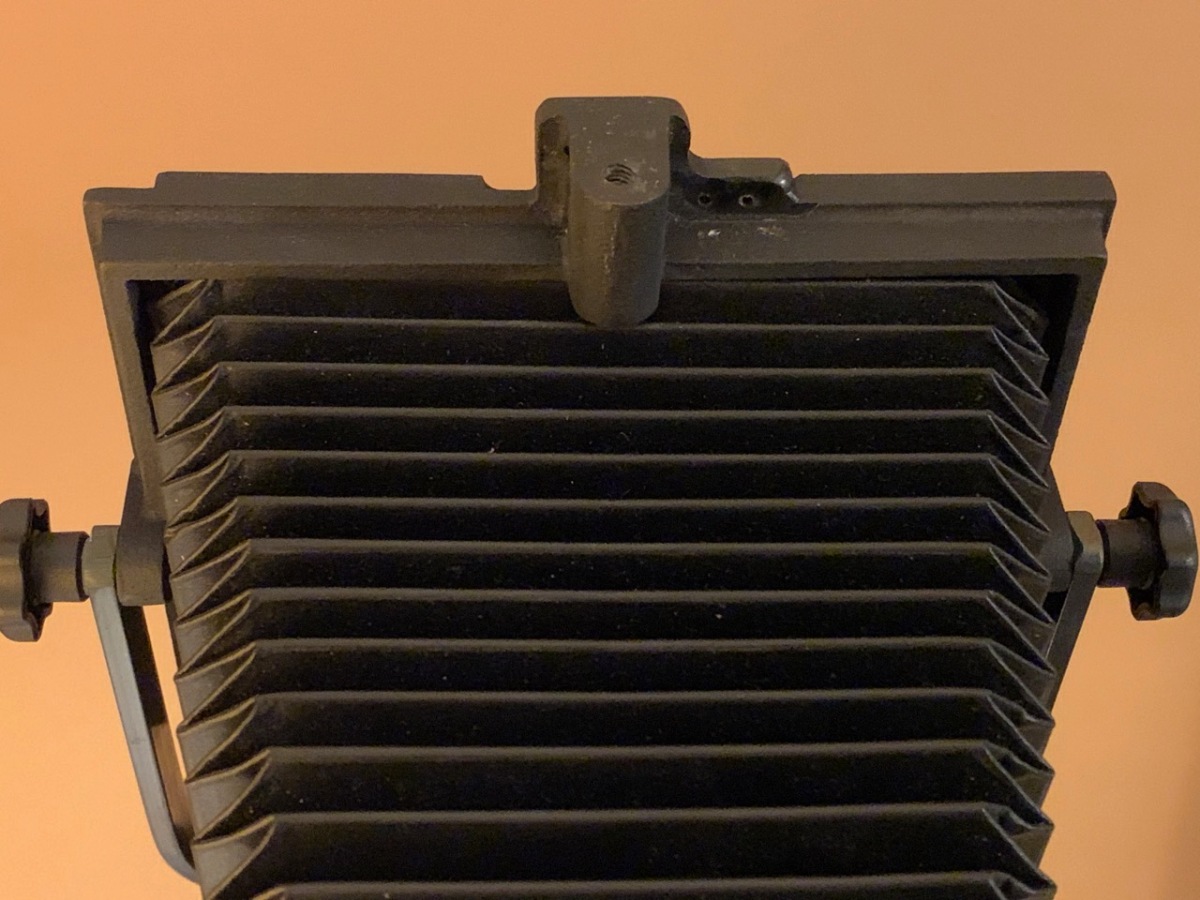
There are a number of interesting old cameras available that use 116 size film…a film size discontinued in 1984. The film is 70mm wide and taped to a backing paper like 120 film. Rolls of 116 film can occasionally be found on eBay, but anything that old is likely pretty sketchy. It is possible to find newer (and sometimes even fresh) unperforated 70mm bulk film and, in a dark room, tape that to a scavenged or homemade backing paper for use in the camera. Here’s another approach to the project. Referenced in that one is a very elaborate procedure from 2008 that describes the conversion of a 116 folding camera. There are also 3-D printable spool adapters on Thingiverse designed to allow the use of 120 roll film spools in a 116 camera. That approach is closer to what works for me, but all of the adapters I found center the film in the film gate. That’s problematic in that you can’t see the backing numbers through the red/orange window in the Brownies and you have to guess the film advance (or count turns). Yuck.
My Solution
I chose to use standard 120 film spools with custom adapters on the feed end and use the camera’s 116 take-up spool with a custom spacer for the other end of the film path.
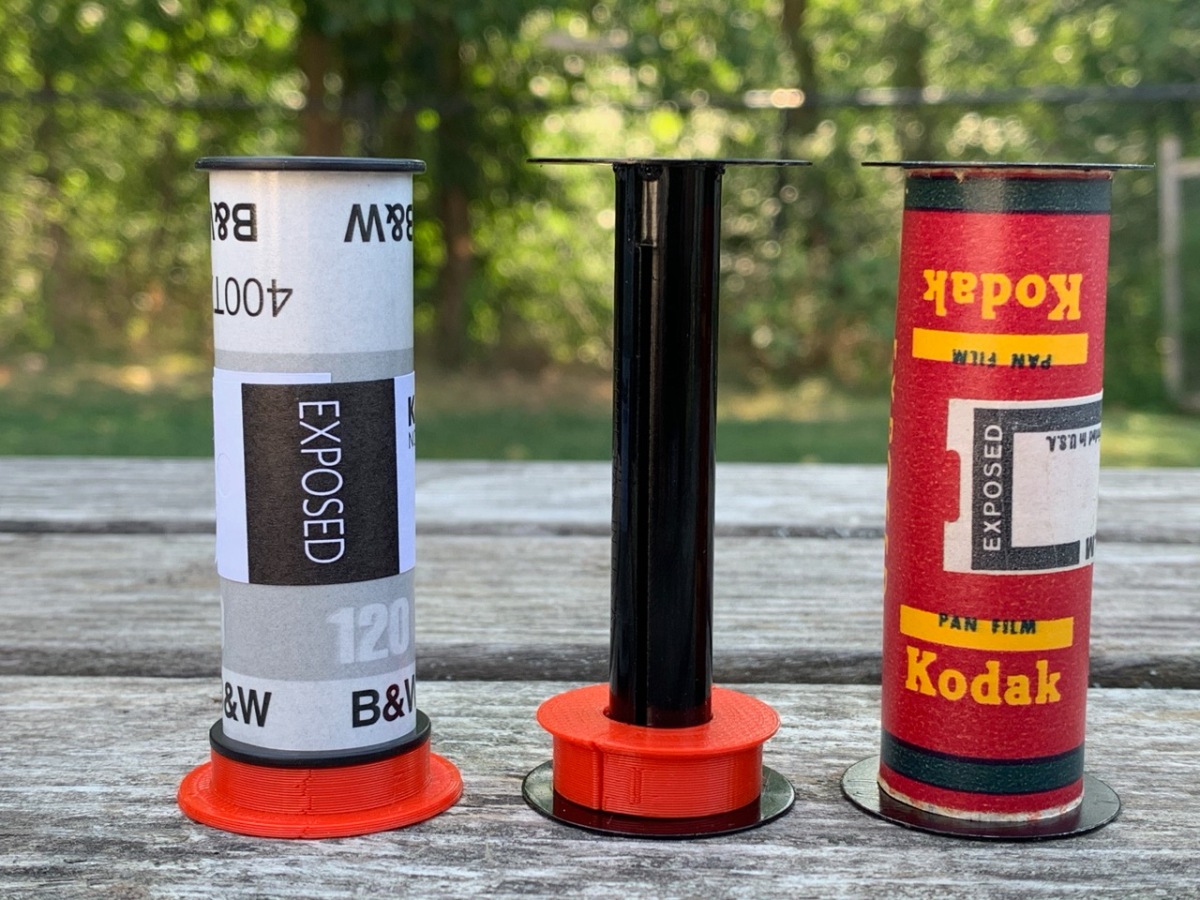
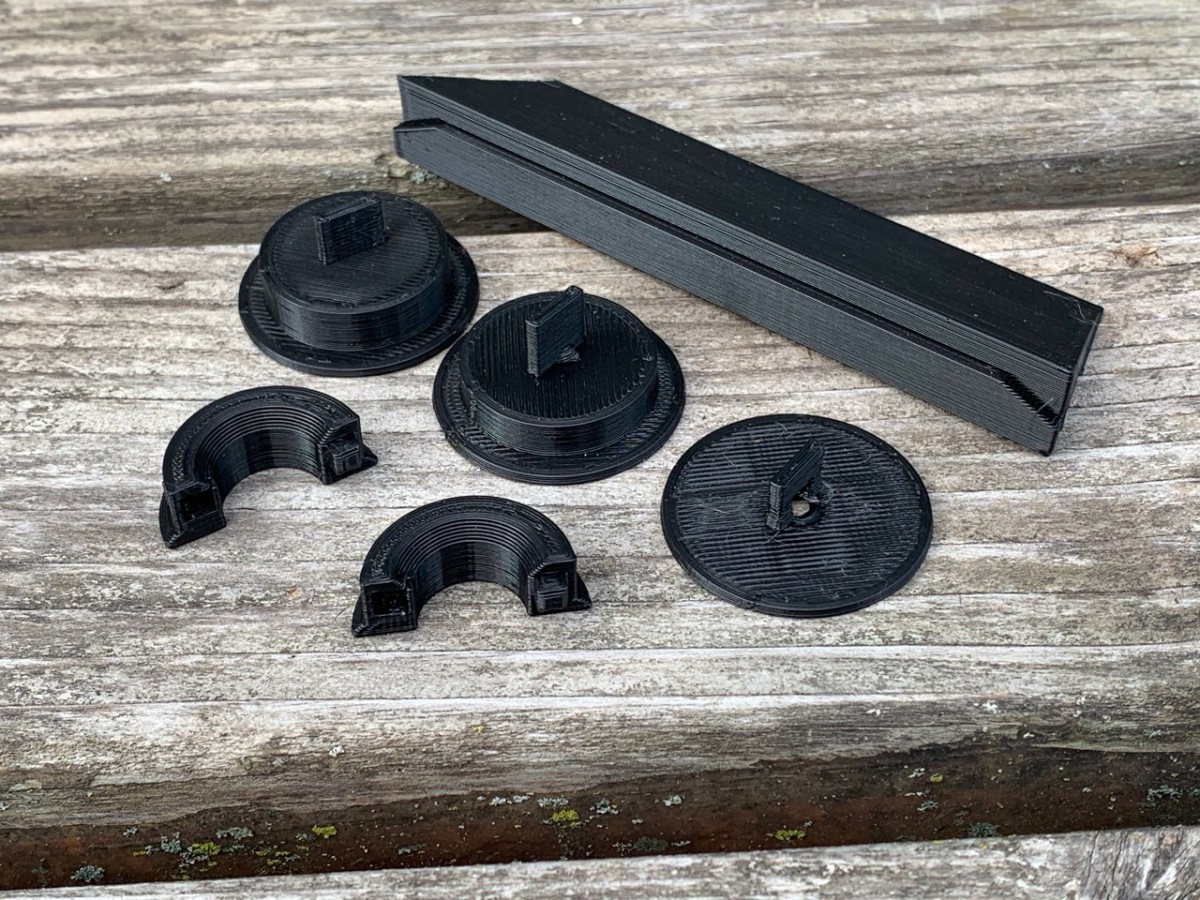
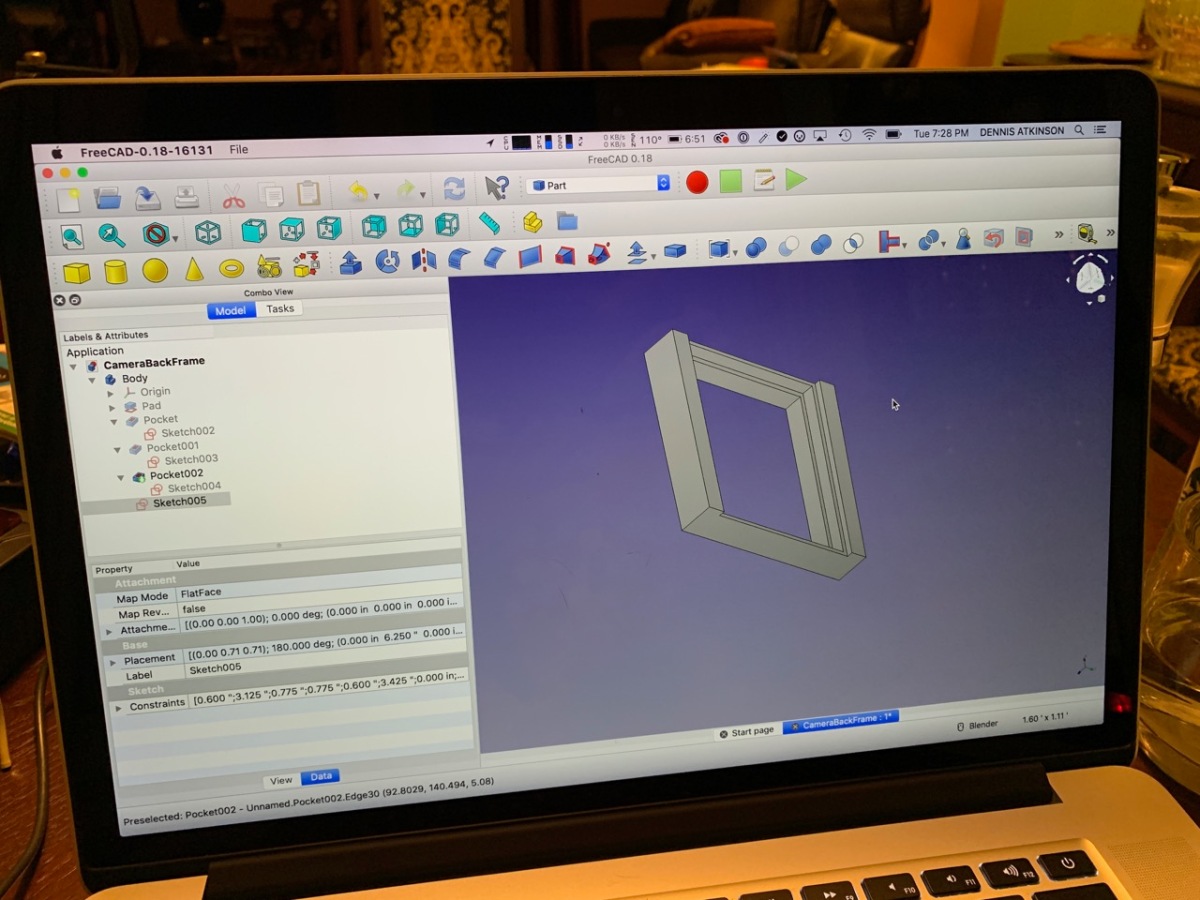
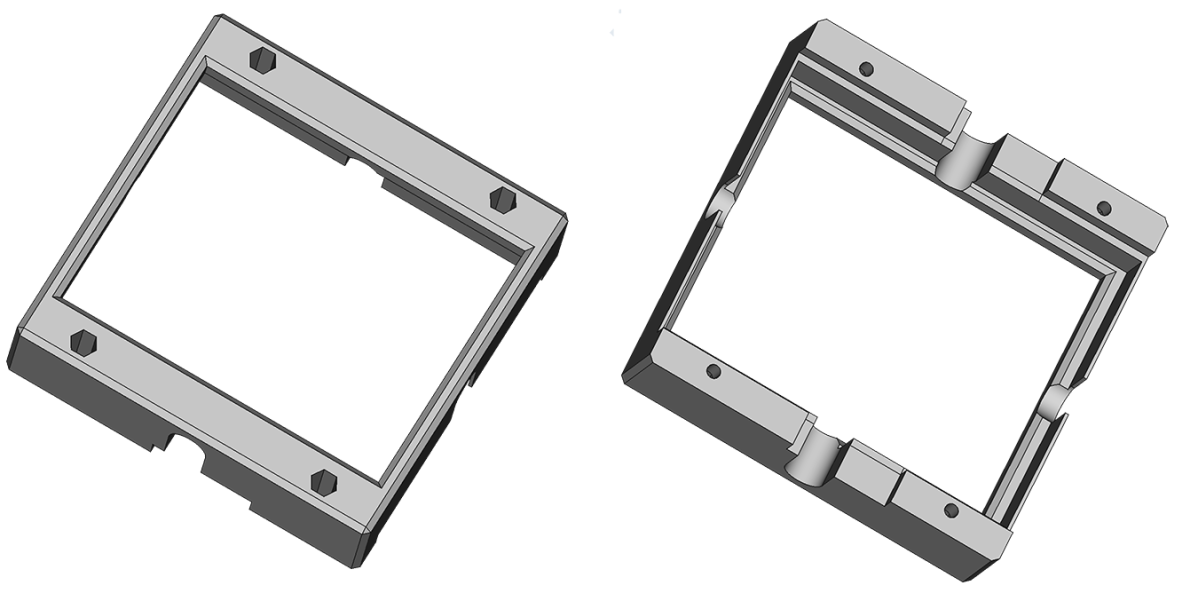
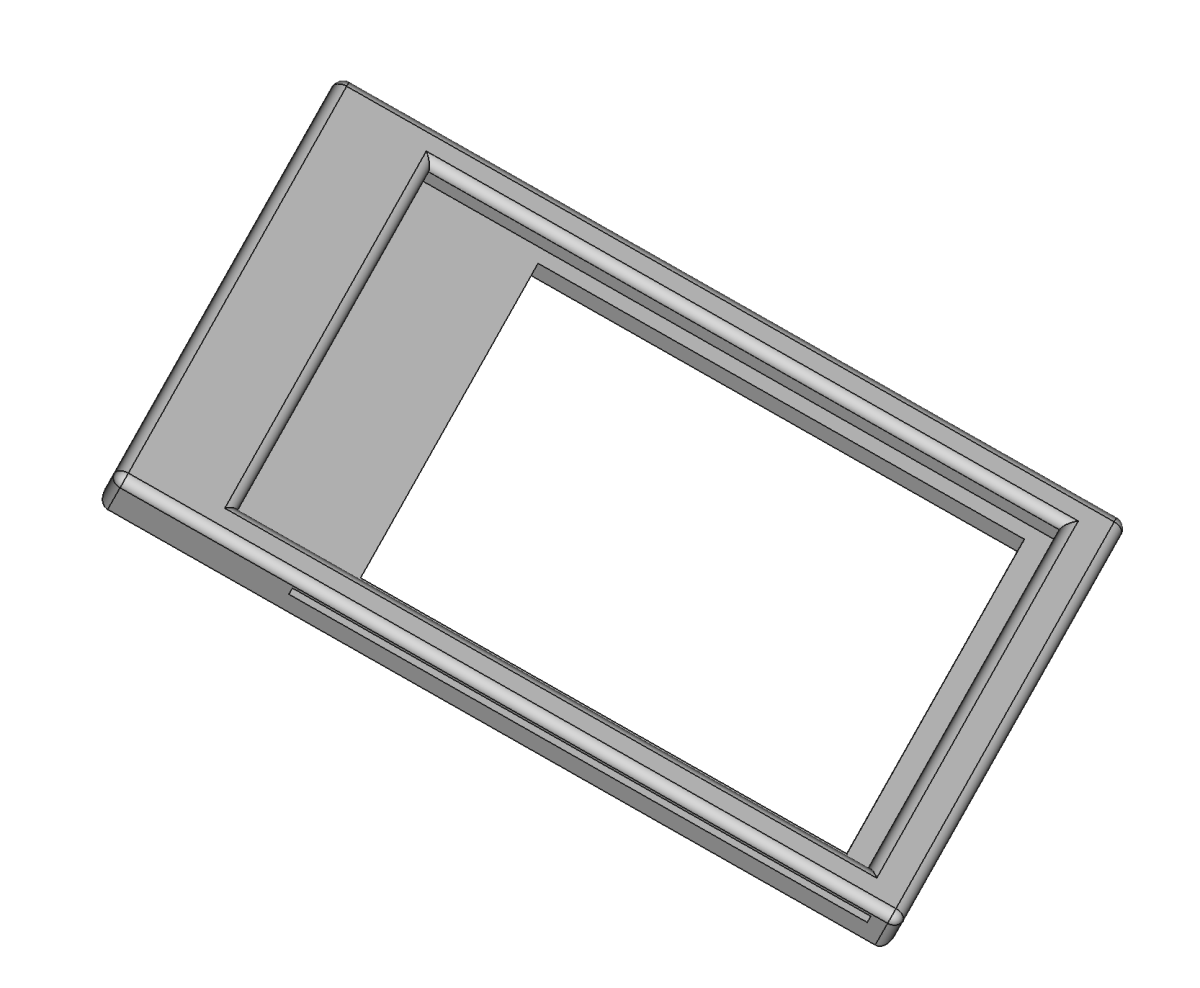
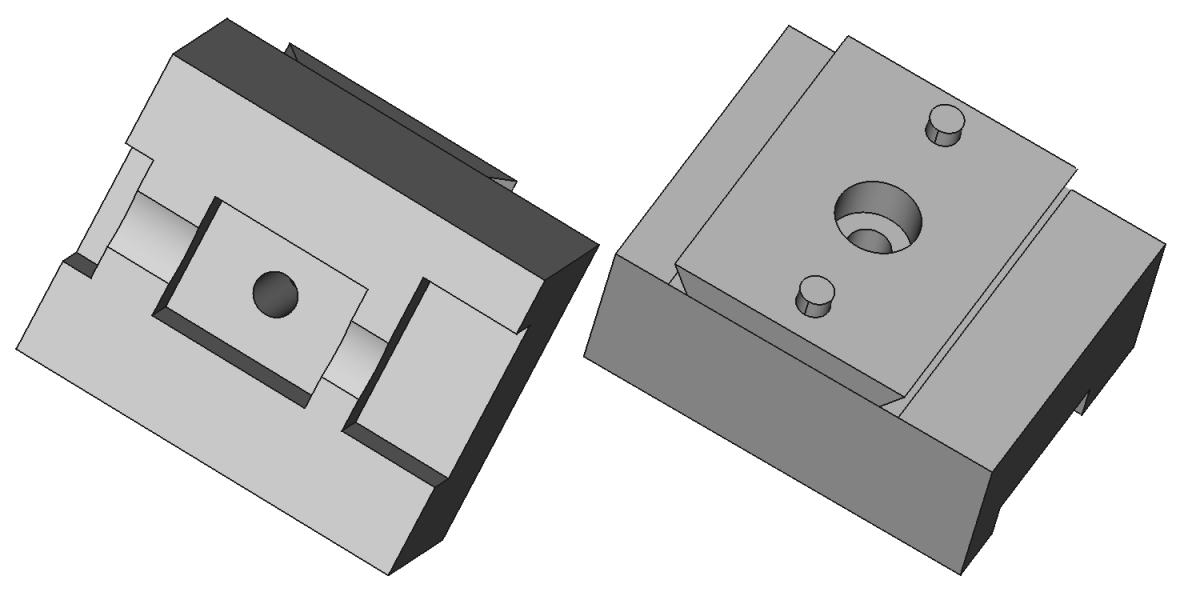
Since 120 film and backing paper is about 10mm narrower than the 116 spool, it won’t track properly and the film will edge fog when the camera is opened to unload the exposed roll. To solve both the fog and the tracking problems, I made a two-piece spacing ring that snaps onto the 116 take-up spool. I also designed several different adapters for the 120 film spool; a thin, flat one and a couple that incorporate spacers of different thicknesses. These keep the 120 film feed end aligned with the take-up end and the film tracks properly. The different sizes were needed to accommodate the variance in the feed ends of the different camera models. The older models, like the 2A Brownie Model B, have locating pins to keep the feed spool in place. Those cameras only need an adapter on one side of the spool. Cameras that use the geometry of the feed area and a piece of spring steel to locate the spool (like the 2A Brownie Model C) require an adapter on both sides of the spool.
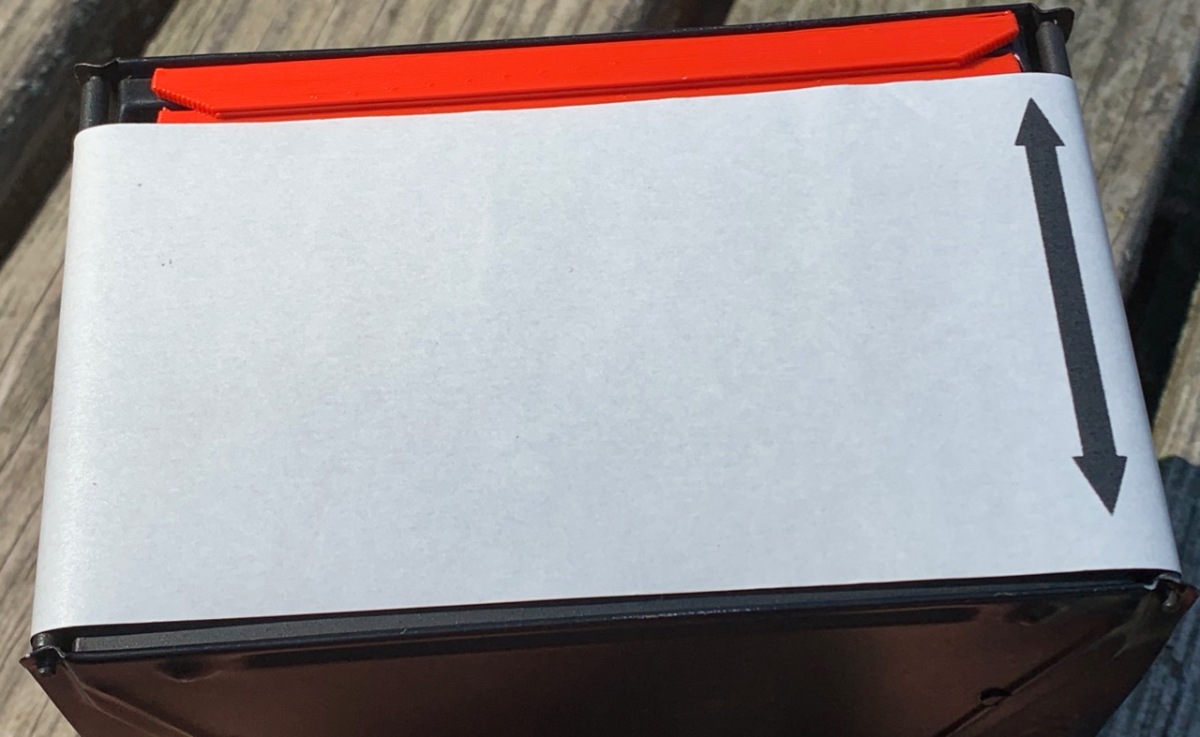
When the film is loaded using the spacers, the film ends up on the left side (vertical/portrait orientation) or the bottom (for horizontal/landscape orientation) of the film gate. Since the film is 10 mm narrower than the original 116 size, you lose about 15% of the image. It’s easy to frame the landscape images…the viewfinder still shows the top accurately. You just have to remember that you’ll lose some image along the bottom. Portrait images will lack a bit from the left-hand side of the image. To ensure that the film feeds straight and to prevent sagging in the film gate, I made a mask that slips in place.
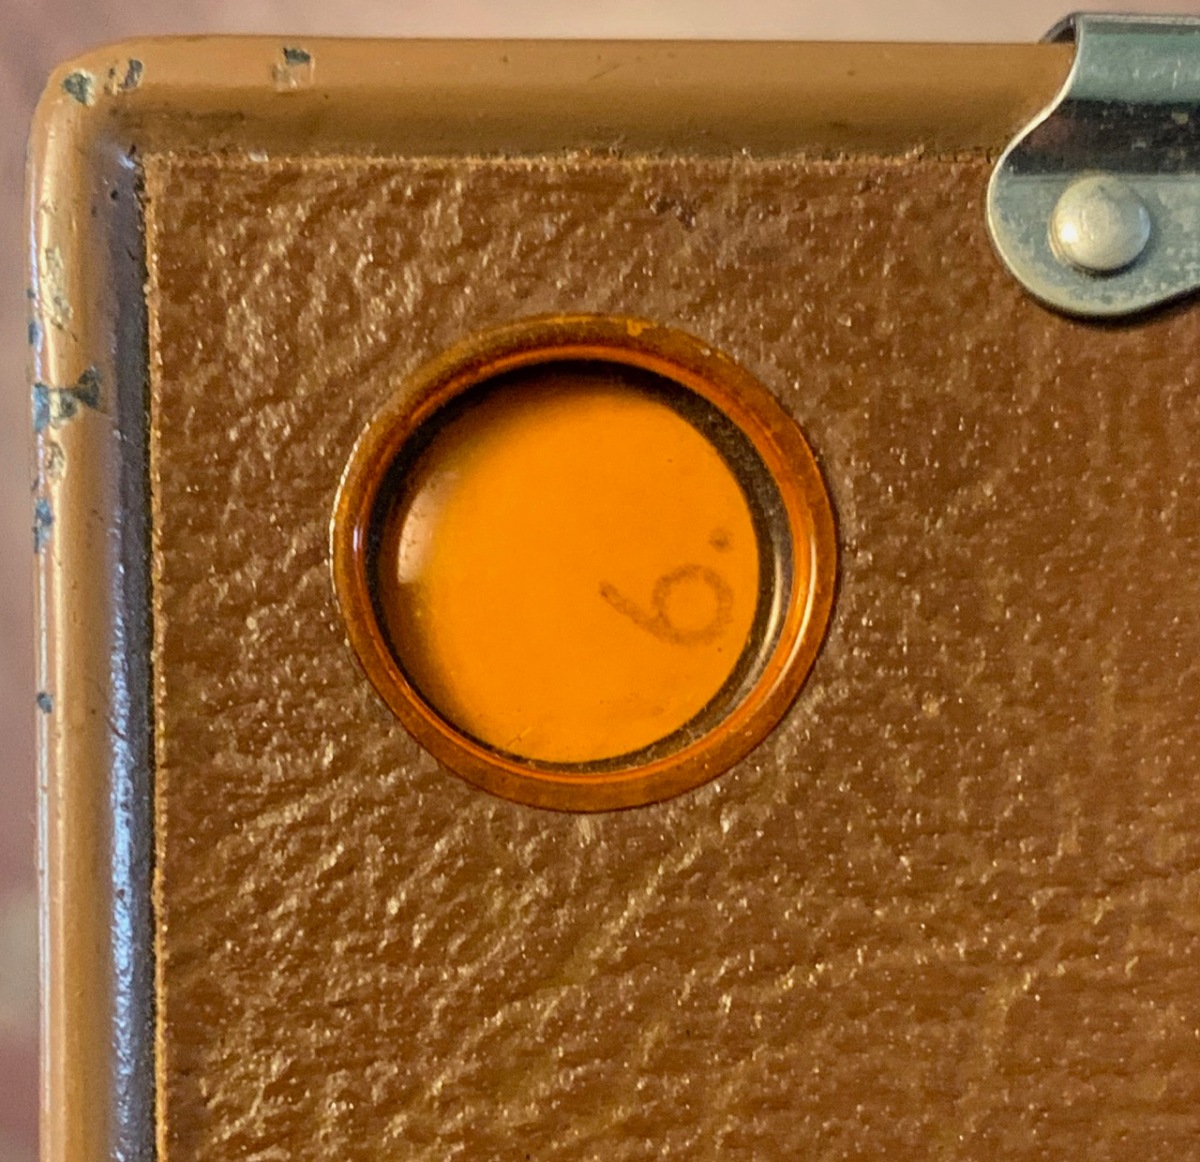
Advancing the film (at least Ilford film) is pretty easy; the 6×4.5 frame numbers (1-16) are visible in the window. You can get six nicely spaced frames by initially rolling to frame 3, then on to frames 5 1/2 (two circles after frame 5 if using Ilford film), 8, 10 1/2, 13, and 15 1/2. Kodak backing paper has the 6×4.5 numbers in a slightly different location. The very bottom of the numbers are just visible in the window but Kodak’s paper has no circles or other marks visible to judge the halfway point between numbers. One half-turn on the advance mechanism will do it.
The masked image is about 55mm x 110mm; a 2:1 format. I like it. Incidentally, some of the Brownie box cameras were available in both 116 and 120 models. I have a No. 2 Cartridge (120 size) Hawk-Eye Model C that is similar but more compact than the 116 versions. Its image is about 55mm x 80mm (1.45:1). You can think of the 116 modifications as yielding panorama(ish) cameras.
The STL files for the parts are available on thingiverse.
The gallery below shows the parts in much more detail. clicking on any thumbnail will take you to a high-resolution copy of the image.


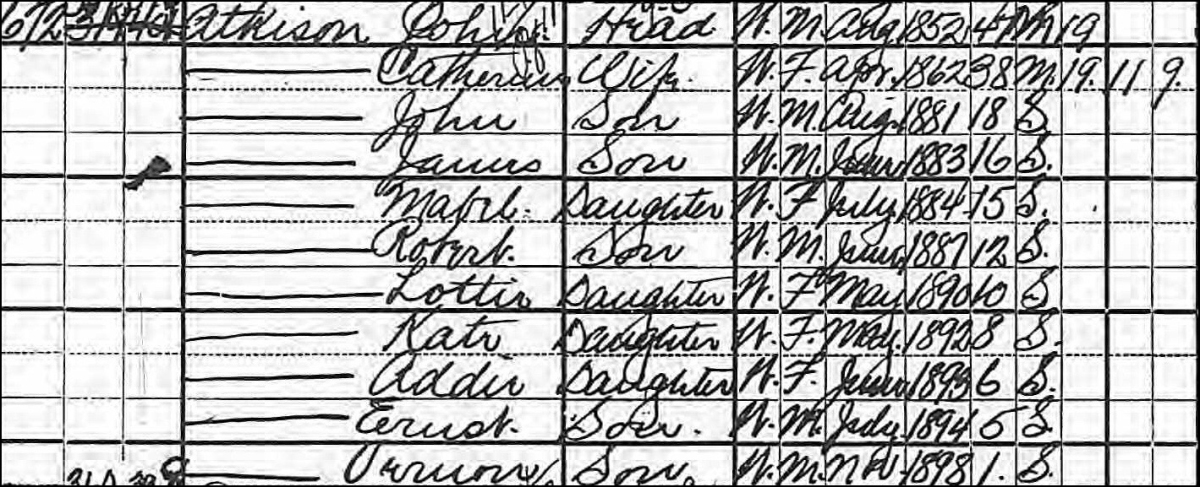

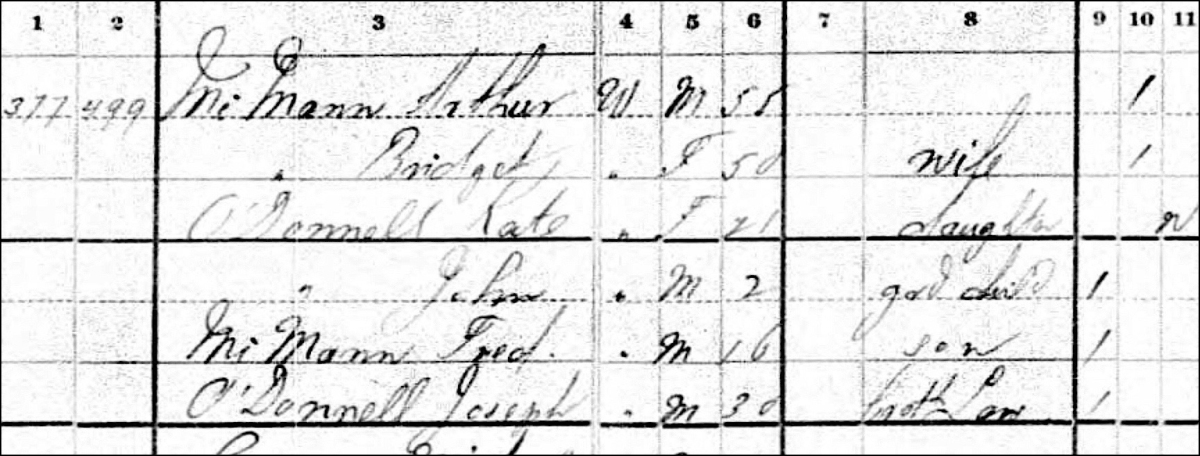

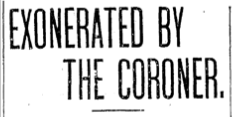
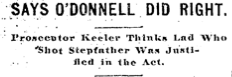
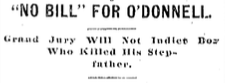
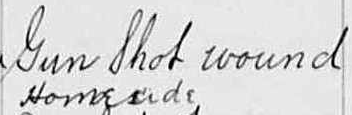 That kinda caught my eye. Dad had told me that there was a scandal…sometimes it was a horse theft, but mostly a family murder scandal.
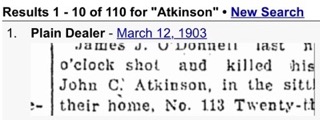 The rest of the story was behind a paywall. That’s how I learned how truly awful newspaper paywalls can be. $10 bucks for 1 day’s access to 20 stories; $20 for a month and 200 stories. Mel pointed out that I’d pay that much for a glass of wine at dinner and shamed me into commitment. I rationalized that I might find a month’s worth of entertainment. The site was appalling and their search, worse. I’d have preferred to be able to view a page at a time, read anything, then get charged for downloading a story. You actually have to pay to read each individual article. I can’t imagine anyone buying in a second time. Next time I’ll wait to go to a Cleveland library.
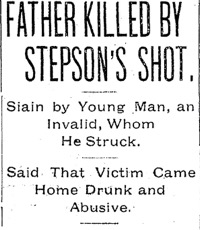
