Using a 116 Camera with 120 Film: Spool Adapters, Spacer, and Mask
Purpose
There are a number of interesting old cameras available that use 116 size film…a film size discontinued in 1984. The film is 70mm wide and taped to a backing paper like 120 film. Rolls of 116 film can occasionally be found on eBay, but anything that old is likely pretty sketchy. It is possible to find newer (and sometimes even fresh) unperforated 70mm bulk film and, in a dark room, tape that to a scavenged or homemade backing paper for use in the camera. Here’s another approach to the project. Referenced in that one is a very elaborate procedure from 2008 that describes the conversion of a 116 folding camera. There are also 3-D printable spool adapters on Thingiverse designed to allow the use of 120 roll film spools in a 116 camera. That approach is closer to what works for me, but all of the adapters I found center the film in the film gate. That’s problematic in that you can’t see the backing numbers through the red/orange window in the Brownies and you have to guess the film advance (or count turns). Yuck.
My Solution
I chose to use standard 120 film spools with custom adapters on the feed end and use the camera’s 116 take-up spool with a custom spacer for the other end of the film path.
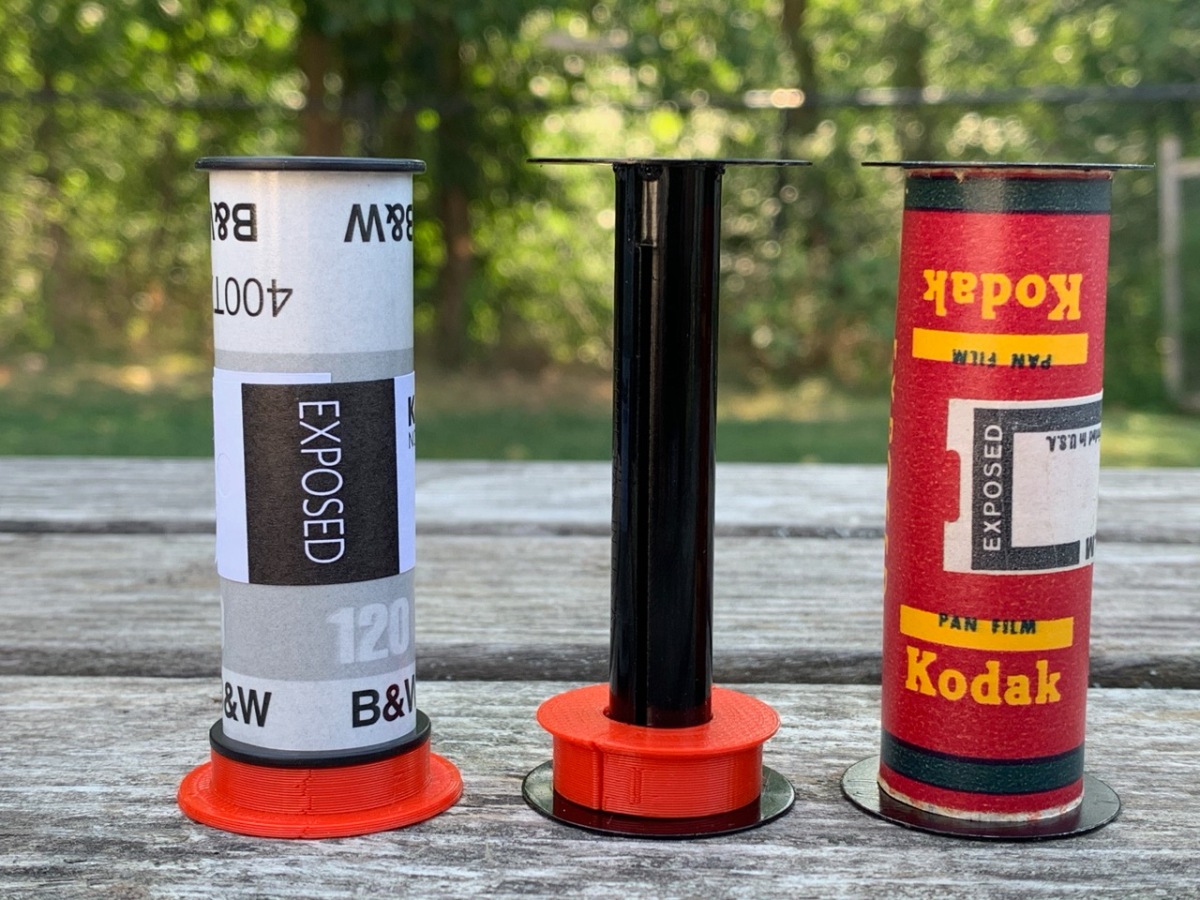
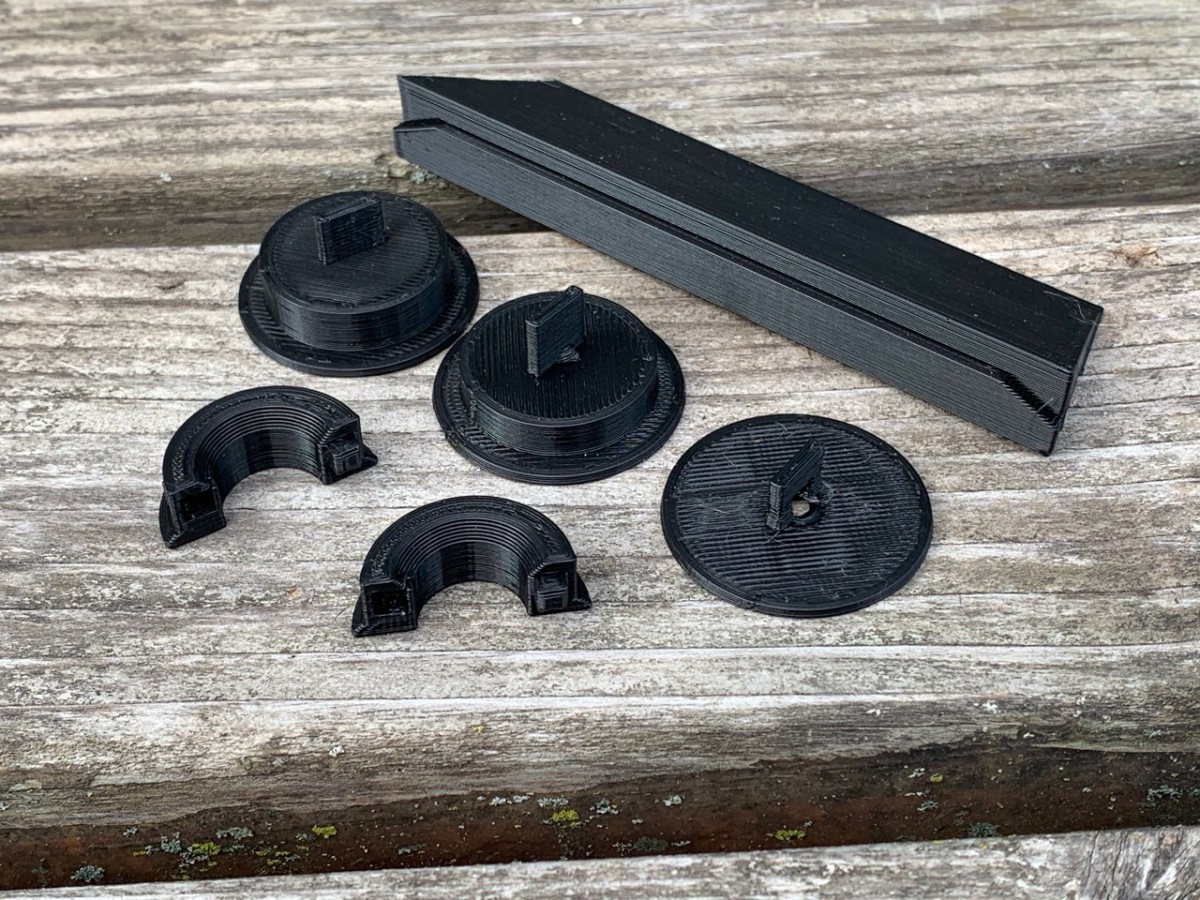
120 film on spool adapter, 116 take-up spool with spacer, 116 film on spool.This is the complete set of adapters. The spacer of the 116 take-up spool is made of two identical half-circles that snap together. The three different size spool adapters are in the middle. The largest (8 mm) can be used alone in the Brownie 2A, Model B. The two smaller adapters (6.5 and 1.5) are used together in the Brownie 2A, Model C. The mask/film support slips on the Brownie’s film guide on the top (horizontal) or right (vertical). I taped it in position using matte black masking tape inside the camera body and along the outside edge, away from where the film travels.
Since 120 film and backing paper is about 10mm narrower than the 116 spool, it won’t track properly and the film will edge fog when the camera is opened to unload the exposed roll. To solve both the fog and the tracking problems, I made a two-piece spacing ring that snaps onto the 116 take-up spool. I also designed several different adapters for the 120 film spool; a thin, flat one and a couple that incorporate spacers of different thicknesses. These keep the 120 film feed end aligned with the take-up end and the film tracks properly. The different sizes were needed to accommodate the variance in the feed ends of the different camera models. The older models, like the 2A Brownie Model B, have locating pins to keep the feed spool in place. Those cameras only need an adapter on one side of the spool. Cameras that use the geometry of the feed area and a piece of spring steel to locate the spool (like the 2A Brownie Model C) require an adapter on both sides of the spool.
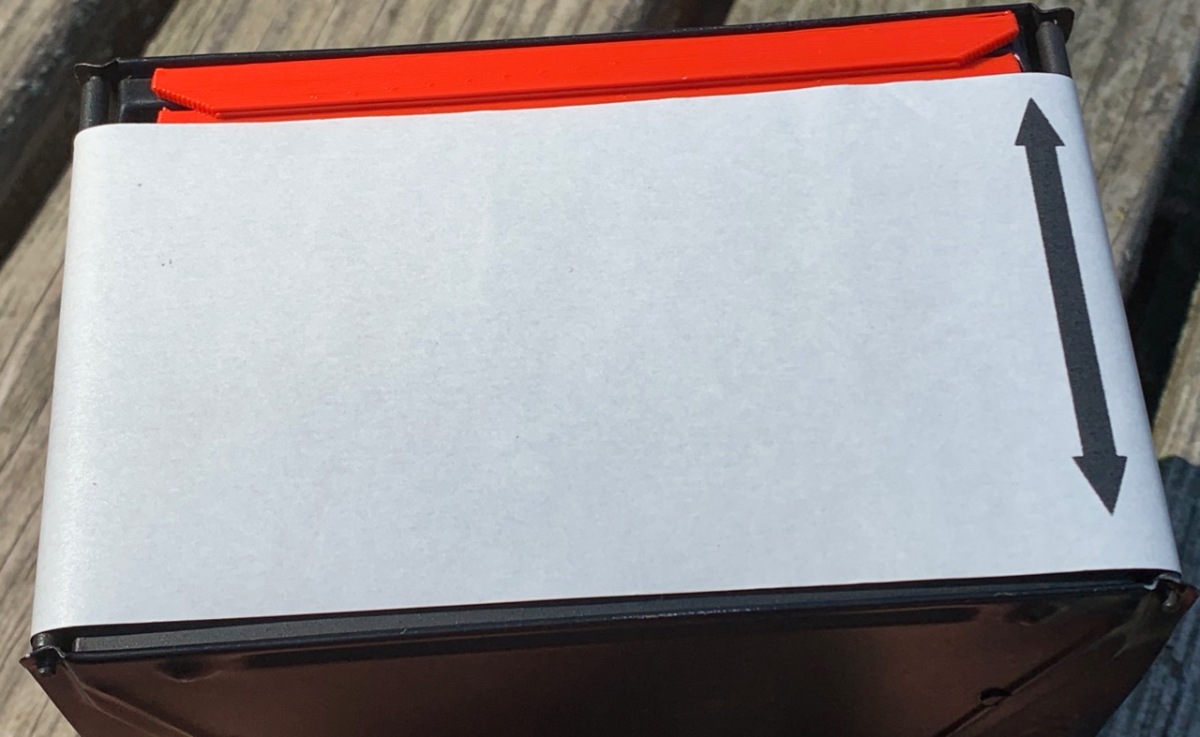
When the film is loaded using the spacers, the film ends up on the left side (vertical/portrait orientation) or the bottom (for horizontal/landscape orientation) of the film gate. Since the film is 10 mm narrower than the original 116 size, you lose about 15% of the image. It’s easy to frame the landscape images…the viewfinder still shows the top accurately. You just have to remember that you’ll lose some image along the bottom. Portrait images will lack a bit from the left-hand side of the image. To ensure that the film feeds straight and to prevent sagging in the film gate, I made a mask that slips in place.
This is 120 film masked and supported across the larger 116 film gate opening in the Brownie 2A, Model C. When the mask/support is in place the image area is about 55 by 110 mm; a nice 2:1 panorama ratio.
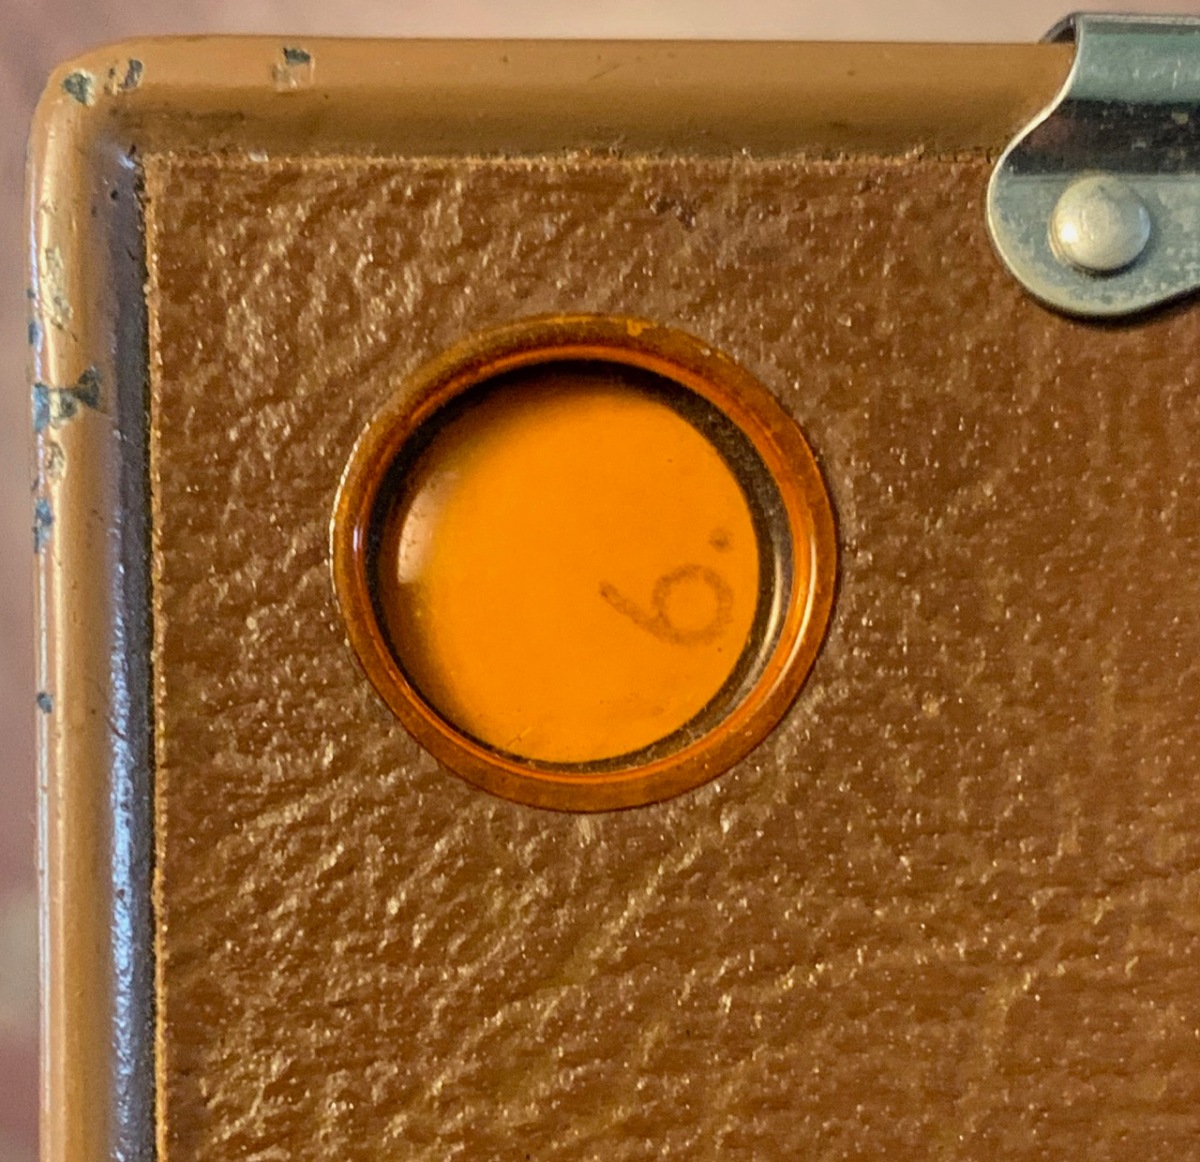
Advancing the film (at least Ilford film) is pretty easy; the 6×4.5 frame numbers (1-16) are visible in the window. You can get six nicely spaced frames by initially rolling to frame 3, then on to frames 5 1/2 (two circles after frame 5 if using Ilford film), 8, 10 1/2, 13, and 15 1/2. Kodak backing paper has the 6×4.5 numbers in a slightly different location. The very bottom of the numbers are just visible in the window but Kodak’s paper has no circles or other marks visible to judge the halfway point between numbers. One half-turn on the advance mechanism will do it.
Here’s an Ilford frame number from a roll of 120 film in window of a Kodak Brownie 2A Model C box camera. The printing on Kodak’s 120 backing paper is in a slightly different spot and is a bit more difficult to see.
The masked image is about 55mm x 110mm; a 2:1 format. I like it. Incidentally, some of the Brownie box cameras were available in both 116 and 120 models. I have a No. 2 Cartridge (120 size) Hawk-Eye Model C that is similar but more compact than the 116 versions. Its image is about 55mm x 80mm (1.45:1). You can think of the 116 modifications as yielding panorama(ish) cameras.
This slideshow requires JavaScript.
The STL files for the parts are available on thingiverse.
The gallery below shows the parts in much more detail. clicking on any thumbnail will take you to a high-resolution copy of the image.
Kodak box cameras, l to r: Brownie No. 2, Model D, 120 film; Brownie 2A, Model B, 116 film; Brownie 2A, Model C, 116 film.
A roll of Kodak 120 Tri-X on the left, Kodak 116 Verichrome Pan on the right.
This is the complete set of adapters. The spacer of the 116 take-up spool is made of two identical half-circles that snap together. The three different size spool adapters are in the middle. The largest (8 mm) can be used alone in the Brownie 2A, Model B. The two smaller adapters (6.5 and 1.5) are used together in the Brownie 2A, Model C. The mask/film support slips on the Brownie’s film guide on the top (horizontal) or right (vertical). I taped it in position using matte black masking tape inside the camera body and along the outside edge, away from where the film travels.
The 120 spool adapter fits on the outside of a standard 120 film spool. The spacer fits on the core of a 116 spool for take-up.
120 film on spool adapter, 116 take-up spool with spacer, 116 film on spool.
This 120 spool is shown with two spool adapters as it would be used in the Brownie 2A-Model C. Only one adapter is needed for the Brownie 2A-Model B.
Two different ways to secure the feed roll in Brownie box cameras. The camera on the left is a Brownie 2A, Model B. The pins on the left and right fit into the spool ends. The Brownie 2A, Model C on the right is a later version of that camera. The piece of spring steel holds the spool (more or less) in position without anything actually going into the spool end.
Here are the three spool adapters. They are approximately 1.5, 6.5, and 8 millimeters thick.
The three spool adapters are approximately 1.5, 6.5, and 8 millimeters thick.
Here’s the Brownie 2A, Model B with a single spool spacer on a standard 120 film spool. Because the spool is held in position by pins in the Model B it is not necessary to use an adapter on the left.
120 spool adapter on 120 film in Brownie 2A, Model B
Here is the supply/feed side of a Brownie 2A, Model C that is loaded with a roll of 120 film using the spool adapters. Unlike the Model B, this camera needs a spool adapter on each end of the spool. That is necessary to keep the film aligned. Without it, the narrower spool end of the 120 film causes the roll to lie at an angle.
120 spool with adapter on one end (for Brownie 2A, Model B), 120 spool with adapters on both ends (for Brownie 2A, Model C), 116 spool for comparison. The three different size spool adapters are approximately 1.5, 6.5, and 8 millimeters thick.
The spacer for the 116 take-up spool is made of two identical half-circles that snap together around the spool spindle. The adapter had to be designed with different diameters on the inside and outside of the finished piece to accommodate the spool positioning spring of the Brownie 2A, Model C. The earlier camera would be fine with a single large-diameter design. That camera positions the take-up spool with a pin on one side and the film-advance winding mechanism on the other…no steel spring to get hung up on.
116 spool with red spacer in place and the two black pieces ready to install on another spool.
The spacer added to the original 116 take-up spool aligns the film and prevents (or at least reduces) the edges of the film from fogging when removing the film spool after exposure. I printed the final copy in black to cut down on any reflections that might contribute to the fogging.
This piece serves to both mask down the image and to support the film edge in the camera. When in place, the opening is about 55 by 110 mm; a nice 2:1 panorama ratio.
The bevel at each end of the film mask/guide piece is designed to help keep the film in position to run straight through the camera’s film transport.
This profile shows the mask/film guide’s slot that is slipped over the camera’s film guide. I taped the part in position using matte black masking tape inside the camera body and along its outside edge.
This is the piece designed to mask and support 120 film as it traverses the larger 116 film gate opening.
This is 120 film masked and supported across the larger 116 film gate opening in the Brownie 2A, Model C. When the mask/support is in place the image area is about 55 by 110 mm; a nice 2:1 panorama ratio.
Here’s an Ilford frame number from a roll of 120 film in window of a Kodak Brownie 2A Model C box camera. The printing on Kodak’s 120 backing paper is in a slightly different spot and is a bit more difficult to see.
The spool adapters ought to fit well, but I believe the mask would not. I think that the bellows would contact and displace the mask when the camera was closed. The box cameras I designed it for wouldn’t have that problem. I would probably try to fashion a guide/mask from the aluminum from a beer or soda can and tape it in place. Its purpose is to prevent the film from sagging out of the focus plane.
I always keep a piece of black tape over the film number window, only removing it to make sure I advance the film properly, and then, as briefly as possible.
I did something similar with a different camera and it worked fine. If I remember correctly my camera didn’t show the edge numbers but rather a different series and I ended up guessing the spacing halfway between for every other exposure…something like 1, 2 1/2, 4, 5 1/2, etc. I had a little chart that I taped to the back of the camera.
You might want to run an empty backing paper through using your plan, opening the camera at each spot to draw the frame outline resulting.
I’ve enjoyed figuring the stuff out. It’s a good diversion.


Great information and clearly explained with good photos. Some questions.
Do you know if the adaptors and mask will fit an Autographic 2A folding camera?
Some sites suggest covering up the film number window. Does the mask prevent the need to do this?
Darrin
LikeLike
Thanks for the comments and questions, Darrin.
The spool adapters ought to fit well, but I believe the mask would not. I think that the bellows would contact and displace the mask when the camera was closed. The box cameras I designed it for wouldn’t have that problem. I would probably try to fashion a guide/mask from the aluminum from a beer or soda can and tape it in place. Its purpose is to prevent the film from sagging out of the focus plane.
I always keep a piece of black tape over the film number window, only removing it to make sure I advance the film properly, and then, as briefly as possible.
Denny
LikeLike
Do you process your own film? If you send it to a lab, do they return your 116 spool?
LikeLike
I do. Most labs don’t return either the spool or the backing paper, but some will if you ask. Check with your lab before you send your film.
LikeLike
Hi Denny –
Great article, and I like those 3D spacers you made! I have a sweet Kodak No. 2 Brownie Special ©1933 that was made to take size 116 film. I was looking closely at the paper backing (and number-spacing) from a roll of 120 film: I’m thinking if I used 120 film in place of 116 in the Kodak No. 2, using the numbers at the edge of the backing paper, I could start at frame #2 for the first image, then I could advance to #5, #8, #11, and #14. This would give me five wide negatives on the final roll (2.50 X 4.25 inches). Is this something you have done? It makes sense to me, but I wanted a second opinion. Thank you, Matt Antonellis
LikeLike
Matt,
I did something similar with a different camera and it worked fine. If I remember correctly my camera didn’t show the edge numbers but rather a different series and I ended up guessing the spacing halfway between for every other exposure…something like 1, 2 1/2, 4, 5 1/2, etc. I had a little chart that I taped to the back of the camera.
You might want to run an empty backing paper through using your plan, opening the camera at each spot to draw the frame outline resulting.
I’ve enjoyed figuring the stuff out. It’s a good diversion.
Denny
LikeLike